So you have created your garden and you need an environmentally friendly way to water your plants! You don't want to disrupt your nature-area by digging up the ground to install pipes and you don't want to haul water from miles away. Luckily, all you have to do is install a hand-pump well! Hand-pump wells do minimal damage to the surrounding area and only affect about a foot radius around it, and only until the plants grow back.

Materials
Before you begin, you're going to need:
1 wellpoint
1 pitcher pump
4 5ft galvenized pipes
1 roll of Teflon tape
1 threaded pipe cap
1 nylon scrubbing brush
4 pipe connecting couplers
2 pipe wrenches
1 sledge hammer or slammer hammer
1 post-hole digger or shovel
1 small bottle of water
Step One: Dig Your Hole
The first thing you have to do is dig your hole. A post-hole digger is what we used and is the best bet for a small about of damage to the surrounding nature. Dig as far as you can without making a very wide hole. If it's bigger than a foot wide, it's too big. Remember to dig your hole in a place that you know has no electrical wires or pipes underneath. Calling your city is a good way to be sure!

|

|
Step Two: Set Up Your Pipe
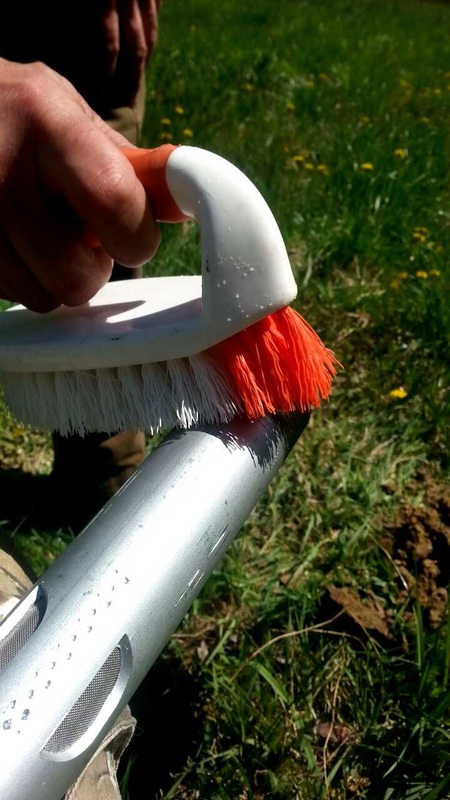
Take your well point, the Teflon tape, scrub brush, a pipe connecting coupler, the two wrenches, and one of the four pipes. Pick up your brush and scrub the threads of the wellpoint. This will clean off the threads and insure a great seal. Next, wrap the Teflon tape around the threads in a very thin layer like below.
Take your well point, the Teflon tape, scrub brush, a pipe connecting coupler, the two wrenches, and one of the four pipes. Pick up your brush and scrub the threads of the wellpoint. This will clean off the threads and insure a great seal. Next, wrap the Teflon tape around the threads in a very thin layer like below.
|

Alexandra holding a wellpoint!
|

|
Take the pipe connecting coupler, brush the inside, then connect to the wellpoint. Then, take the galvanized pipe and brush and tape it like the wellpoint. Connect the galvanized pipe to the other end of the pipe connecting coupler. Tighten both sides with the two wrenches.

|

|
Step 3: Hammer in Your Pipe
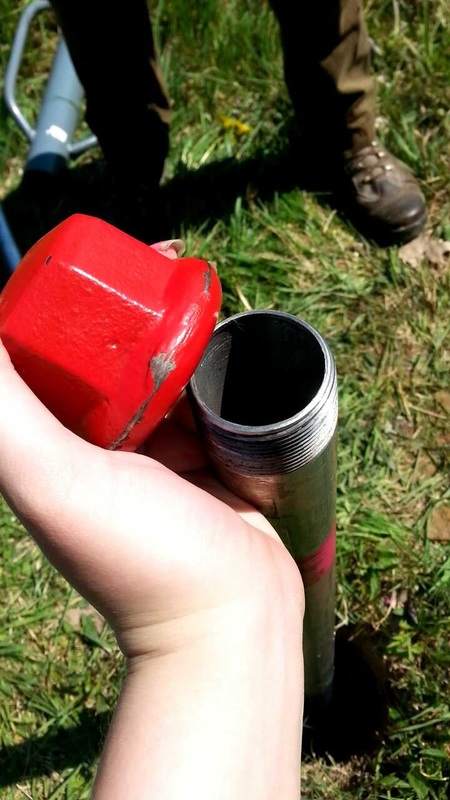
Next, screw on the threaded pipe cap to protect your pipe. Position your pipe, with the wellpoint pointing down, into the ground. Have a partner help you keep the pipe straight and hold it upright. Take your sledge hammer or slammer hammer and start pounding! Once there is only about 12 inches left of the pipe sticking out of the ground, repeat the steps above (brush, tape, twist) until all four pipes are into the ground, replacing the threaded pipe-cap each time.
Next, screw on the threaded pipe cap to protect your pipe. Position your pipe, with the wellpoint pointing down, into the ground. Have a partner help you keep the pipe straight and hold it upright. Take your sledge hammer or slammer hammer and start pounding! Once there is only about 12 inches left of the pipe sticking out of the ground, repeat the steps above (brush, tape, twist) until all four pipes are into the ground, replacing the threaded pipe-cap each time.
|

|
Step 4: Set up Pitcher Pump
Take your pitcher pump and screw it onto the pipe. Use wrenches if necessary. Next, pour some water into the opening of the pitcher pump. This will allow the leather to expand of the inside of the pump, creating the pressure that will bring the water up the pipes. Wait for ten to twenty minutes and you can start pumping! The water will be brown at first but will eventually clear up. Once it's clear, you're all done! Congrats!
Take your pitcher pump and screw it onto the pipe. Use wrenches if necessary. Next, pour some water into the opening of the pitcher pump. This will allow the leather to expand of the inside of the pump, creating the pressure that will bring the water up the pipes. Wait for ten to twenty minutes and you can start pumping! The water will be brown at first but will eventually clear up. Once it's clear, you're all done! Congrats!

|

|
